When we first moved into our house in 2012, the kitchen unexpectedly became one of our first big projects. We had intended to update it "at some point" but after living in it for a few weeks, it quickly moved to the top of the list! (terrible layout was causing so much frustration, this was kind of like a quality of life upgrade!)
We opted for Ikea cabinets and decided to do the main part of the kitchen and leave the refrigerator wall alone for the time being until we were really sure what we wanted to do over there (and until we had more money!)
This cabinet over the "peninsula" was designated the home for wine glasses and tea. It worked out pretty well, but wasn't overly easy for me to access much above the bottom shelf since I was reaching over the counter and around the door... so this fall, I had an idea. What if I take down the cabinet and replace it with floating shelves? Of course, I didn't want to lose a cabinet, but there was room for it on the half of the kitchen we didn't renovate, so I could reinstall it there!

Brad was not completely on board, mostly afraid that we'd end up screwing up a cabinet in the process, and since Ikea has discontinued our cabinets, his point was valid. Buuuuut, I did it anyway, I just waited until he wasn't home. ;) That's kind of my routine... but it's ok because it worked! And as usual, Brad was happy with the result and pretty relieved to not have to be here when things were possibly falling apart. ;) Everybody wins!






I love when my plans work out! :)

read more
We opted for Ikea cabinets and decided to do the main part of the kitchen and leave the refrigerator wall alone for the time being until we were really sure what we wanted to do over there (and until we had more money!)
This cabinet over the "peninsula" was designated the home for wine glasses and tea. It worked out pretty well, but wasn't overly easy for me to access much above the bottom shelf since I was reaching over the counter and around the door... so this fall, I had an idea. What if I take down the cabinet and replace it with floating shelves? Of course, I didn't want to lose a cabinet, but there was room for it on the half of the kitchen we didn't renovate, so I could reinstall it there!

Brad was not completely on board, mostly afraid that we'd end up screwing up a cabinet in the process, and since Ikea has discontinued our cabinets, his point was valid. Buuuuut, I did it anyway, I just waited until he wasn't home. ;) That's kind of my routine... but it's ok because it worked! And as usual, Brad was happy with the result and pretty relieved to not have to be here when things were possibly falling apart. ;) Everybody wins!
But of course, we need some progress pictures! Here's the before.

I started by emptying it, of course, and then took it off the wall. Ikea makes this process pretty easy. I just had to unscrew it from the rail and muscle it down. It was ok to skip the gym today!

Here's a picture of the wall where the cabinet is headed. It's pretty sad "before".

I slid the refrigerator over a few inches, rehung the rail, and got the cabinet up. This part would have been easier with help, but I'm not patient. It took a couple of adjustments to get things right, but it worked!

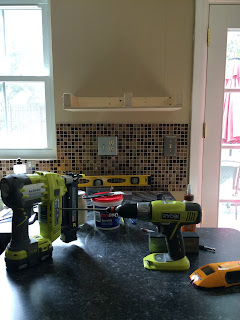
Now it was time to attack the shelves. I patched, sanded, and painted the wall and then got to work. I used plans from Shanty-2-Chic for these shelves.


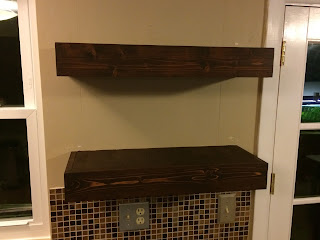
I stained it in place.

Then polyed with the Triple Thick Poly. Hard to be patient why that dried...


I added hooks under the bottom shelf for coffee cups to leave room for my wine glasses in another cabinet. Now it's useful for coffee and the storage and pretty with some decorative items.

Since this is the view we have right as we walk into the house, we love the openness that the open shelves provide.


