Monday, January 11, 2016

Hey, remember me?!

So I know that so many bloggers start out strong and then posts start lagging, but holy cow - my last post was in MAY?!?!

Well, I'm going to try again. Not a Near Year's Resolution, not some sort of personal challenge, just feeling like my feet might be back under me and so I'll give it another go!

My Etsy shop has kept me pretty busy, which is great! It had been basically steady over the summer with a couple of orders a week, then picked up in the fall (which was great timing since the kids BOTH started school :) ) with 4-5 orders a week, and then HOLY MOLY the Christmas orders! I'm so thankful for the success of the shop this fall and I was SWAMPED! I hit 100 sales during that time, which made this whole thing feel more legitimate. THANK YOU to all of my customers and to my friends and family for the support and encouragement. This whole shebang has been a huge test in vulnerability and I wouldn't be able to do it without you all! :) 

So, I'm back and I am excited to share some of the many projects I've been working on while I've been away from the blog. The shop is now up on Instagram and I have posted pictures of orders as well as projects around the house - check it out and if any of them especially interest you, let me know and I'll start there with the new posts! 


I'M BACK!!!


read more

Monday, May 18, 2015

Bike Rack

It's been warm and nice around here lately and the kids have been riding their bikes and scooters as much as possible! They tend to pull something out, ride it down the driveway and around the cul-de-sac, and then right back up to switch toys and head back down... super fun, but the resulting pile of wheels, pedals, and handlebars gets cluttery and frustrating!

We spent a lot of time Saturday cleaning out the garage and I decided a bike rack would be a great help with the bike and scooter situation! Building is way more fun than cleaning, of course, so I decided to start right away! ;)

I collected some 2x4s and 3" screws and got to work. I cut 3 30" pieces for the long sides of the base and the connecting piece on top. Next I cut two 17" pieces for the rest of the base. I wanted to use my Kreg jig so that I could lay all of the base pieces flat, but I didn't have long enough pocket hole screws, so I improvised and pre-drilled and screwed right through the outside of the base frame. 

Next I cut 2 18" pieces for the vertical supports, connected them to the base, then connected the cross piece. 

Next for the fun part! I used my miter saw to cut 1x2s at 45 degrees on each end (22" on the long side) and my super fun Ryobi Airstrike nail gun and Gorilla Wood Glue to attach the 1x2s to the frame! 


 (don't be confused - I did start with a 2x2, but realized I wouldn't have enough!)

I only went part of the way across the rack with the 1x2s because I realized that the scooters would sit in it better without the supports. Time to test it out!


Paint makes everything better!


Here it is in place! I hung an old coat rack on the wall above it for the helmets to help avoid the constant, "Mom, where's my helmet?" question!


One more step toward a more organized garage!! 

read more

Monday, April 27, 2015

Announcing...

While I haven't been blogging much lately, I have been keeping very busy in the garage. But my silence was partially a cover because I've been kind of, ...well, ...terrified about talking about what I've been up to!

Time to stop being a chicken! 

Recently I opened an Etsy shop! While I mentioned it in my post about the Book Wedge, I've been really hesitant to make a big announcement about it. I guess there are a lot reasons for that, but enough, already! 

So here it is!


I'm starting out with smaller, shippable items for the home and I've been having so much fun coming up with designs!

Come check it out! 


read more

Tuesday, March 24, 2015

The Book Wedge!

I'm no longer between miter saws :) I was able to sell my old one and get my snazzy new Ryobi saw this weekend. I've had so much fun playing with it! Yay power tools!

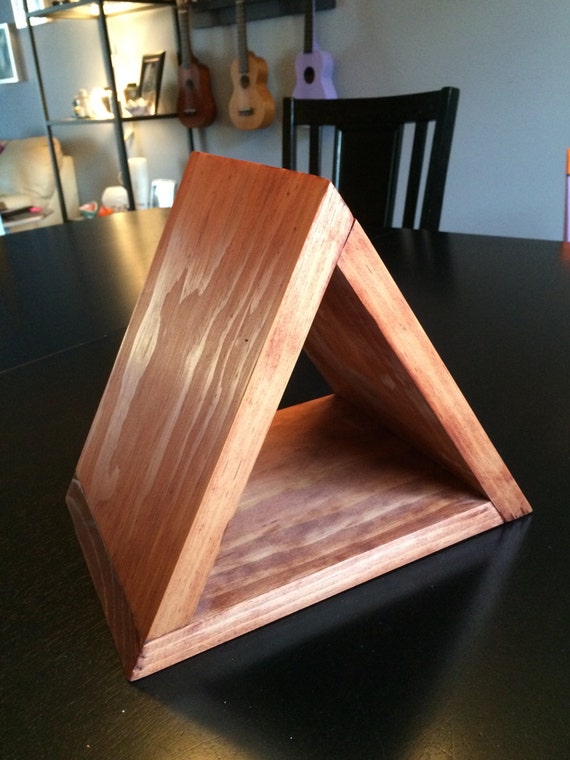
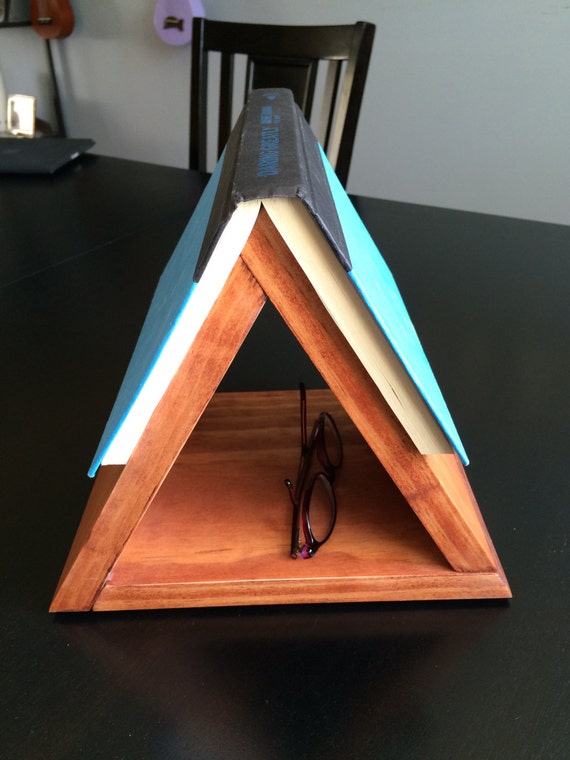
I've been working on the bookcase hutch unit for the girls' beds, but took a break from that on Monday to play with the bevel on the new saw.  I opened my Etsy shop this week and wanted to try out a couple of designs for some smaller shippable items to add. After remembering my geometry and figuring out angles of a triangle, I made this cute bedside bookmark/book stand thingy!


I made this one out of scrap plywood and didn't band the edges or anything, so it's a little rough rustic on the sides, but I love it! Once I cut the pieces, I put some Gorilla Wood Glue on the edges and nailed it together with my air nailer - man, I love that thing! (and Ryobi doesn't pay me to say that, it's just such a cool tool!)

I added some felt pads to the bottom to help it be friends with the tables it may end up sitting on and then got it ready for a photo shoot!

I grabbed a couple of the books I had handy for the demo - these are two of my favorites, so they're usually close-by! ;) 

Here it is pre-paint - I love that the space inside can hold reading glasses!


Naked! :


Side view:

Top view:

With Kindle and glasses - it could probably even fit another book inside for those readers who always have at least two books going at a time!


So fun! The girls helped me name it and after tossing around things like "The Book Tent" and "The Wooden Bookmark Book Stand House" (well, it's descriptive!), we settled on The Book Wedge and listed it in the shop!

***Edited to add some more pictures of stained, fancier-looking book wedge ;)


read more