I'm no longer between miter saws :) I was able to sell my old one and get my snazzy new Ryobi saw this weekend. I've had so much fun playing with it! Yay power tools!
I've been working on the bookcase hutch unit for the girls' beds, but took a break from that on Monday to play with the bevel on the new saw. I opened my Etsy shop this week and wanted to try out a couple of designs for some smaller shippable items to add. After remembering my geometry and figuring out angles of a triangle, I made this cute bedside bookmark/book stand thingy!

I made this one out of scrap plywood and didn't band the edges or anything, so it's a littlerough rustic on the sides, but I love it! Once I cut the pieces, I put some Gorilla Wood Glue on the edges and nailed it together with my air nailer - man, I love that thing! (and Ryobi doesn't pay me to say that, it's just such a cool tool!)
I added some felt pads to the bottom to help it be friends with the tables it may end up sitting on and then got it ready for a photo shoot!
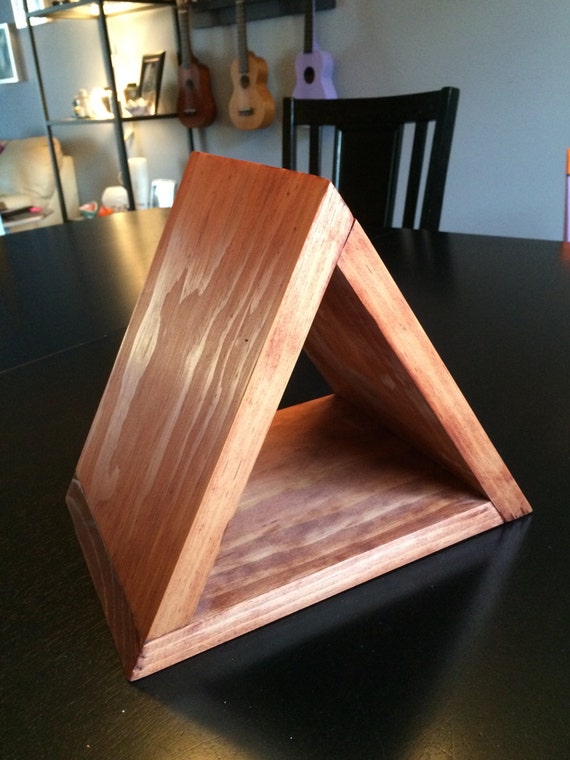
Here it is pre-paint - I love that the space inside can hold reading glasses!

Naked! :


Side view:

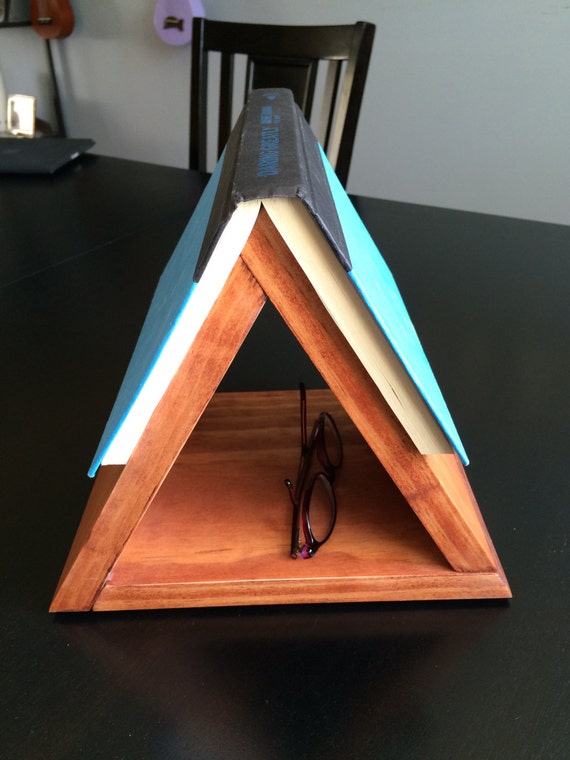
Top view:

With Kindle and glasses - it could probably even fit another book inside for those readers who always have at least two books going at a time!
So fun! The girls helped me name it and after tossing around things like "The Book Tent" and "The Wooden Bookmark Book Stand House" (well, it's descriptive!), we settled on The Book Wedge and listed it in the shop!
***Edited to add some more pictures of stained, fancier-looking book wedge ;)
read more
I've been working on the bookcase hutch unit for the girls' beds, but took a break from that on Monday to play with the bevel on the new saw. I opened my Etsy shop this week and wanted to try out a couple of designs for some smaller shippable items to add. After remembering my geometry and figuring out angles of a triangle, I made this cute bedside bookmark/book stand thingy!
I made this one out of scrap plywood and didn't band the edges or anything, so it's a little
I added some felt pads to the bottom to help it be friends with the tables it may end up sitting on and then got it ready for a photo shoot!
I grabbed a couple of the books I had handy for the demo - these are two of my favorites, so they're usually close-by! ;)
Here it is pre-paint - I love that the space inside can hold reading glasses!
Naked! :
Side view:
Top view:
With Kindle and glasses - it could probably even fit another book inside for those readers who always have at least two books going at a time!
So fun! The girls helped me name it and after tossing around things like "The Book Tent" and "The Wooden Bookmark Book Stand House" (well, it's descriptive!), we settled on The Book Wedge and listed it in the shop!
***Edited to add some more pictures of stained, fancier-looking book wedge ;)