Monday, May 18, 2015

Bike Rack

It's been warm and nice around here lately and the kids have been riding their bikes and scooters as much as possible! They tend to pull something out, ride it down the driveway and around the cul-de-sac, and then right back up to switch toys and head back down... super fun, but the resulting pile of wheels, pedals, and handlebars gets cluttery and frustrating!

We spent a lot of time Saturday cleaning out the garage and I decided a bike rack would be a great help with the bike and scooter situation! Building is way more fun than cleaning, of course, so I decided to start right away! ;)

I collected some 2x4s and 3" screws and got to work. I cut 3 30" pieces for the long sides of the base and the connecting piece on top. Next I cut two 17" pieces for the rest of the base. I wanted to use my Kreg jig so that I could lay all of the base pieces flat, but I didn't have long enough pocket hole screws, so I improvised and pre-drilled and screwed right through the outside of the base frame. 

Next I cut 2 18" pieces for the vertical supports, connected them to the base, then connected the cross piece. 

Next for the fun part! I used my miter saw to cut 1x2s at 45 degrees on each end (22" on the long side) and my super fun Ryobi Airstrike nail gun and Gorilla Wood Glue to attach the 1x2s to the frame! 


 (don't be confused - I did start with a 2x2, but realized I wouldn't have enough!)

I only went part of the way across the rack with the 1x2s because I realized that the scooters would sit in it better without the supports. Time to test it out!


Paint makes everything better!


Here it is in place! I hung an old coat rack on the wall above it for the helmets to help avoid the constant, "Mom, where's my helmet?" question!


One more step toward a more organized garage!! 

read more

Monday, April 27, 2015

Announcing...

While I haven't been blogging much lately, I have been keeping very busy in the garage. But my silence was partially a cover because I've been kind of, ...well, ...terrified about talking about what I've been up to!

Time to stop being a chicken! 

Recently I opened an Etsy shop! While I mentioned it in my post about the Book Wedge, I've been really hesitant to make a big announcement about it. I guess there are a lot reasons for that, but enough, already! 

So here it is!


I'm starting out with smaller, shippable items for the home and I've been having so much fun coming up with designs!

Come check it out! 


read more

Tuesday, March 24, 2015

The Book Wedge!

I'm no longer between miter saws :) I was able to sell my old one and get my snazzy new Ryobi saw this weekend. I've had so much fun playing with it! Yay power tools!

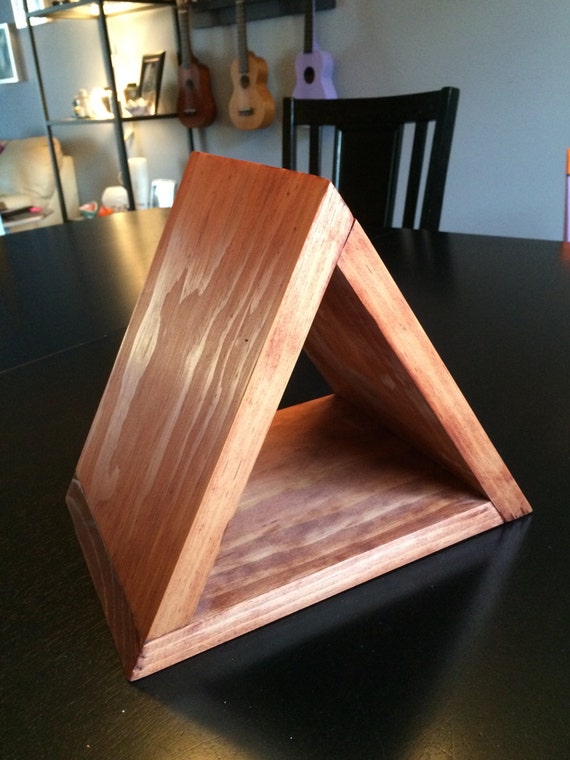
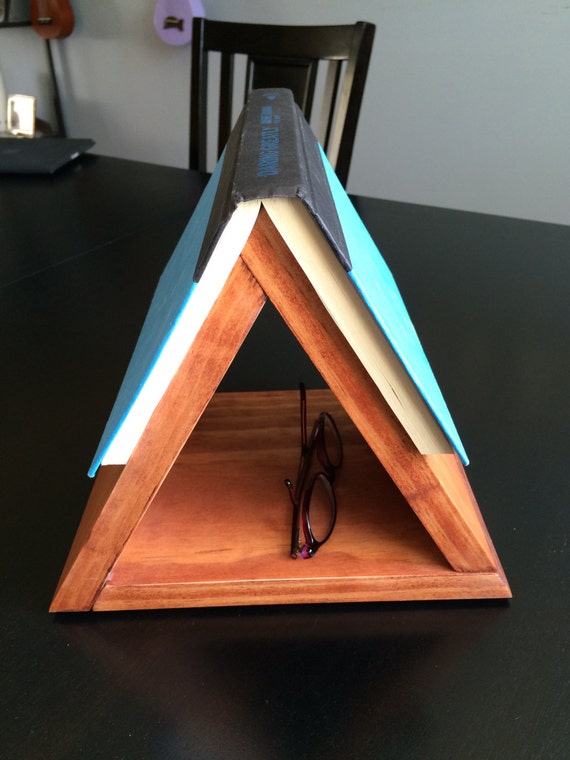
I've been working on the bookcase hutch unit for the girls' beds, but took a break from that on Monday to play with the bevel on the new saw.  I opened my Etsy shop this week and wanted to try out a couple of designs for some smaller shippable items to add. After remembering my geometry and figuring out angles of a triangle, I made this cute bedside bookmark/book stand thingy!


I made this one out of scrap plywood and didn't band the edges or anything, so it's a little rough rustic on the sides, but I love it! Once I cut the pieces, I put some Gorilla Wood Glue on the edges and nailed it together with my air nailer - man, I love that thing! (and Ryobi doesn't pay me to say that, it's just such a cool tool!)

I added some felt pads to the bottom to help it be friends with the tables it may end up sitting on and then got it ready for a photo shoot!

I grabbed a couple of the books I had handy for the demo - these are two of my favorites, so they're usually close-by! ;) 

Here it is pre-paint - I love that the space inside can hold reading glasses!


Naked! :


Side view:

Top view:

With Kindle and glasses - it could probably even fit another book inside for those readers who always have at least two books going at a time!


So fun! The girls helped me name it and after tossing around things like "The Book Tent" and "The Wooden Bookmark Book Stand House" (well, it's descriptive!), we settled on The Book Wedge and listed it in the shop!

***Edited to add some more pictures of stained, fancier-looking book wedge ;)


read more

Friday, March 20, 2015

Feature Friday!! - Shannon's Fireplace Makeover

My friend Shannon is one of the people who, maybe without knowing it, inspired me to take on projects around the house once we owned our own place! She is a handywoman extraordinaire and has done a lot of work around her house - I love seeing her projects! Women with power tools rock!

This time she tackled her green tile fireplace with some chalk paint. She says:

I guess some people like a green marble fireplace...but not me.  It just stuck out like a sore thumb against my surrounding decor.  I wasn't sure I wanted to tile over it so I started looking for an easier and cheaper solution.  This came in the form of Annie Sloan chalk paint.  I went online and found a store that would mail some to me since there weren't any stores nearby that offered it. 

This is my old (I consider ugly) marble fireplace.  I first cleaned it with a simple solution of water and Dawn to get all the soot and grease off the marble.


Items used for project:  I used Annie Sloan Chalk Paint in French Linen.  I ordered two of the 4oz trial sizes which covered the fireplace in two coats with half of one bottle left over.


This is the fireplace after one coat.  Still a little streaky.  Supposedly, the chalk paint normally needs only one coat.  This was my first time using this paint and I believe it would work but with the slickness of the marble, I think it required two coats of paint.


This is the fireplace after two coats. I then applied two coats of Annie Sloan Soft Wax. (Also ordered online.)


This is the finished product about 2 months after completion. I love the end product.  And I would do it again.  It does have a few scratches which can easily be touched up but it was a much easier and cheaper than pulling out the old marble or tiling over it.  


Beautiful, Shannon! It looks great! Thanks so much for sharing! 

Happy Friday everyone!
read more

Wednesday, March 18, 2015

Wall Sconces

When I saw these wall sconces on Shanty-2-Chic, I fell instantly in love! Such a simple look and so simple to assemble!


I asked Brad to pick up a 2x6 on his way home and I got to work!

I cut the wood using my circular saw. On such a thick piece, a miter saw would have been easier, but I'm currently between miter saws. ;) I positioned the ledges, predrilled holes through the back of the larger piece, glued and screwed. Whew, building phase complete! ;) I sanded the edges and corners with 120 grit sandpaper and got ready for color!


Look at the beautiful wood grain! When I saw that, I decided to stain these instead of painting. I've been anti-stain since my troubles with my console table, but since then I have learned a lot about staining and after staining our stairs last month, I've renewed my confidence!

I couldn't decide quite what I wanted for color, but thought something in the gray family would be nice. I wanted something weathered looking without going too rustic. Googling around led me to BeachBumLivin and his tutorial on layering stain. How cool!

I worked on the back and sides of the sconces first. I figured I'd save the most visible parts for last so I'd have more practice by the time I did them. ;) I started with a layer of Varathane Kona stain. Beachbumlivin said to leave it on to dry and then sand it lightly, but I'm not always that patient... it was actually really hard to just trust the process and wait through it - life lessons through woodworking, eh? But I did leave the Kona stain to soak in for about 10-15 minutes before wiping it off.

I sanded it lightly with 220 grit sandpaper, just in some spots to bring out that pretty woodgrain. I repeated the whole process with the Kona. Not sure why this scared me so much, even after testing it out on a scrap piece! I was just already in love with the sconces and was afraid I'd screw them up! I actually set a timer and went inside so I wouldn't be tempted to wipe the stain off early!

BeachBumLivin said he went straight to the Sunbleached stain from here, but after testing this out on a scrap piece, I decided to try layering in Weathered Gray first (also both Varathane). I loved the way it looked! Different grains of the wood picked up different layers of the stain and it looked really cool. I didn't take pictures in between these steps because both the gray and the sunbleached only sat for a minute before I wiped them off. I lightly sanded any areas that took up too much of one color or another and I was so happy with the results!


I let it all dry for an hour or so and then turned them over to work on the front. Here's a picture that shows the Kona alone next to the layered stain.


I just love the result!!


The Shanty-2-Chic sconces use wine bottles, which I had planned to do. I soaked the empty wine bottles in a baking dish with a couple of tablespoons of baking soda dissolved in water. Thirty minutes in the water and the labels peeled right off!

After looking at it, though, I decided my ledge might be too high for the wine bottle and found vases as an alternative. I couldn't decide which I liked better and since these are being donated to a silent auction, I decided to poll my Facebook friends to see which design was more appealing to most people.


The vase was the overwhelming favorite, so for this time around, I went with that. I used Gorilla Epoxy to attach the vases securely to the ledges. Keeping it real in my kitchen...


I just had to hang them in my house for a minute before I take them over to church. Use your imagination and picture candles or pretty flowers in them! What would you fill them with?


read more

Wednesday, March 11, 2015

Wine Wednesday - Wine Rack and Glass Hanger

It's Wine Wednesday!


I made this wine rack in stages - we've had a LOT of snow days lately here in NOVA, some of which were frigidly cold, so my garage time has been limited! (Also, I kind of tore the carpet off our stairs and am working on refinishing them, but that's a story for another time. ;) )

I first saw this design on a brag post on Ana White's site and loved the idea, but wanted something less rustic-looking. I decided to make it with clean, smooth boards instead of pallet wood to achieve the more crisp look I had in mind. I based my design off of the picture and just sort of messed around with it until I got it put together. Sometimes trial and error is the best way to go. ;)


Because I was anxious to get it done and see if my design would work, I put it all together without painting it - not the best plan, but live and learn!

The cuts for the wine glasses didn't work as well as I had hoped, but I let it go. Surprising, right? Well, that didn't last too long - my obsessiveness eventually got the best of me and I fixed it later, surprising no one.

At this stage, I painted it the dark blue/gray that I'm in love with right now (just like the Christmas Card Frame) and left it alone for a bit. (The lighting here really doesn't show the color well! Much more blue and less gray in person!)


I decided that this would be a perfect birthday gift for my sweet mother-in-law (she loves making wine with Janet and loves handmade gifts!) and so tore off the glass rack piece to try again - can't gift something I'm not proud of!

Redoing the rack was more trial and error to be sure the glasses wouldn't hit each other. My measuring was wrong the 2nd time and the cuts were such that the glasses would hang off-center... can't have that! Blargh. So I started a THIRD time and finally got it the way I wanted it (trial and error sometimes wastes wood and that made me mad!). The cuts are still not as smooth and perfect as I'd like, but I'm still working on the technique - decided to stop being so critical of myself and let it go. Shocking, I know!

She loved her gift! Here is a picture of it in action, though not drilled into the wall since this is my house! My wonderful assistants held it up for the picture - hand-modeling agents can contact me for their info! ;)


Since the whole piece really needed a second coat of paint, I suggested Chris choose something from my collection that would suit her best... she picked my fav green! (The same as I used on the table saw stand!) Preeeeetttty!


All done! Can't wait to see a picture of it installed and full!

I learned a lot through this project. Hopefully I can make it more easily next time! I'm planning to list it in my Etsy shop when I get it up and running. Yes, I'm working on opening up an Etsy shop! So scary fun!

Tools used - all my favs! : Ryobi Circular Saw, Ryobi Air Nailer, Kreg Jig, and Ryobi Drill

read more

Saturday, February 14, 2015

"Love Note" Plaque

Happy Valentine's Day!

I was feeling the love making this fun plaque for my sweet husband. I love the way it turned out - a little rustic without looking too rough. :) I had originally intended to write a line from a favorite song inside the heart like I saw over at Tatertots & Jello, but after I did it, I decided I liked mine better without the words and I painted over them! ;)


I started by taking a couple of kind of ratty 1x3s and cut them down to 21" each.

I inspected each to find the least rough-looking side and laid them up on the work bench with the nicer sides facing down.

Then I took a couple of long-enough-for-the-job scraps (hence the mis-match) to attach to the back. So happy to use my Ryobi Air Nailer for this job - I seriously love this thing, and they're not paying me to say that! I put a couple of nails into each plank and I was done! I still get giddy when I use pneumatic tools just like I did the first time Ben showed me how to use one. Thanks, Ben. Love always.


To make it easy to hang on the wall, I set my Circular Saw to 45 degrees and mitered the edge of a smaller scrap 1x3 and nailed between the supports. I purposely attached it to two planks in the hopes of making the whole thing a little more secure.


Next it was time to sand. And sand, and sand, and sand. Fortunately, I got a new random orbital sander for Christmas and I got Brad a corner cat sander, so I tried both of them out on this project. I was impressed with what they could do on even such rough planks.


Time to paint! I started by painting the whole thing gray, then sketched a large heart with pencil (as lightly as I could - and could hear Ben shaking his head at me. Tsk, Tsk.) I taped off lines with painter's tape and then used an off-white to paint between the tape. I removed the tape, erased what I could of the pencil lines, and let it all dry before touching up with both the gray and white.


Ta-da! All done! I LOVE IT! And so did Brad, so that's good, since it was technically for him - but I sure did have fun with this one, so I guess it was a little for me too. ;)


I've finally decided to open an Etsy shop for some of my smaller pieces (I have very convincing friends!) and I think I'll add this one to the shop! Fun to do, and I love how it looks hanging up! And I can just picture it leaning on the mantle as part of someone's pretty, seasonal decor! :)


read more