
For a while, we had a craft table and supplies here. It was nice to have a place for the kids' general craft supplies to be accessible to them all of the time and they used this area often.
This is the best "before" picture I can find. See the Ikea loveliness for organizing some of the craft supplies? LOVE. It's mostly kitchen organizers.

Of course, it eventually became a clutter magnet with half-done projects, coloring books, etc and they rarely had space to actually work at the table. Plus, they just keep growing and we were finding that they weren't fitting at the table as well as they used to. :p
Partly in an effort to "de-preschool" and declutter parts of our home, I decided to move the craft table and supplies to the basement and put a more narrow table in this space. I went hunting through Ana White's plans and decided on this table.
I modified the plans to add a shelf and to make the table fit the space perfectly. I used 1x8s instead of 1x4s for the back and side aprons. Then I installed 1x2s across the back and front to support the plywood shelf. Here's what it looks like from underneath.

I opted to put a shelf on the bottom of the table instead of the stretcher and trim. To do this, I installed the trim pieces (step 4 in the plans linked above) at the front and back of the table (instead of on either side of the stretcher, as described) and then added a piece of plywood, cut to size, to make the shelf. Here's what that looks like from underneath on the finished table.

I also left off the breadboard on top of the table (steps 8 & 9) because I liked the smooth look of one solid piece on top.
The edges of the plywood were showing above the trim on both shelves, and I didn't like the way they looked because they took the stain differently than the other surfaces. Maybe it wouldn't have bothered a lot of people, but these are the kinds of things that can quietly drive me crazy if I don't deal with them! ;)

I solved the problem by cutting a thin dowel piece to fit and nailing it to the plywood.

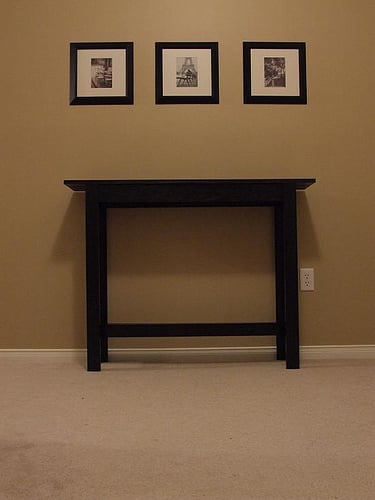
I chose to stain this table instead of painting it. WOW, that was a pain. So many coats, and I couldn't get the color to be quite what I wanted. It turned out to be a sort of blue-gray. I was really going for gray, but I have to say that this color has grown on me now that the table as been in place for a while.

Overall, I'm happy with how the table turned out and it was fairly easy. The staining process took longer than the building process!
If you have any questions or comments about how I did the modifications, let me know in the comments!
No comments:
Post a Comment