Showing posts with label ana white. Show all posts

Thursday, March 3, 2016

Coat Closet Mudroom

Do you have one space in your house that you're just never satisfied with? For me, it's my coat closet. I have changed this closet more times that I can count!

I thought I had solved it with my first build of a tall, narrow shoe shelf with hooks above and to the sides of it. It worked for a while, but the kids, and so their coats, have grown! And the weather in Northern Virginia this winter has been having an identity crisis and so we need different jackets from one day to the next! Clutter, crowding, ACK!

ANYway, more thinking and staring has been happening, with the vague plan of trying to do something in there but without much of an idea of what I want to do.

Then I saw this pop up on my Pinterest feed and the wheels started turning. What if I modify this to make it fit the coat closet?! I loved that it provides space for shoes without wasting the rest of the depth of the floor space. And I loved that I could stash stuff in the back depending on the season - snow gear, soccer gear, swim gear, whatever!


When I measured and found my space to just be about half the size of Ana's, I was convinced. Easy mods, organized and hopefully more spacious coat closet, and even a place to sit to get shoes on and off!

I had to plan for the doorway opening that is more narrow than the actual closet. I learned from an earlier failed attempt at getting a shelf system in there that a shelf as wide as the actual closet would never actually get into the closet and be able to turn into place. So this build would have to be assembled in place. In the closet. With no closet light. CHALLENGE ACCEPTED.

Empty it, pull off the moulding (not pictured), ready to go!


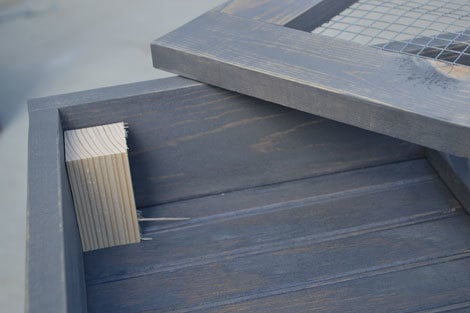
I started by cutting all of the pieces I would need for the shoe shelves and storage area. I planned to assemble this with Kreg joinery, so I drilled the pocket holes at this point.

Next I stained everything (Varathane Dark Walnut stain to match the stairs) and applied polyurethane to both sides of all of the pieces.

I don't think I have ever said how much I love this poly, but seriously - this stuff rocks. Super thick application, one-and-done on coats, and a smooth finish without all of the pickiness of regular poly. Seriously, I can basically just slap this on, go over sections to smooth when I need to, and it dries quickly and looks great! If you've worked with regular poly with all of it's bubbles and lines and multiple layers, you will understand how awesome this is! Varathane isn't paying me or anything, I just really love this stuff!


Once all of the pieces were dry, I headed into the closet. There aren't any pictures of the construction here - I basically followed Ana's plans and swore a lot at the frustration of building in an area only 1.5" wider than the piece. ;) But it came together!


I put up the coat rack piece next and then on to the top cubbies. Same process, similar swearing. Installation of this part was a bit trickier - this closet is really odd and is lacking in studs. There are only two on the whole back wall and they're both on the right side! And the side walls are basically devoid of studs. So weird. I decided to hang it with L-brackets to make it easiest. Because there are only the two studs, I put L-brackets on the tops and bottoms just to have more attachment in the stronger areas.


When I was antsy during one of the drying stages, I made this little key/glasses/wallet hanger for one of the side walls. We'll try out this prototype for a while and if it works well, I'll add it to my Etsy shop soon!


All done!  (horrible lighting to try to take this pictures! Sorry!)


I'll explain how I did the plank wall later if anyone is interested. I'm planning to do something on the side walls too, mostly to cover all of the anchor holes from previous versions of the closet, and to cover the paint without painting. ;) Any ideas on what I should do on the sides? Plain (stained) plywood sheets? More planks? Something else?


I noticed I ended my last post about this closet with "maybe it will stay like this for a while now" and now I'd like to say it again, but this time it had better because it's built in! These will have to be taken apart to get them out now! ;)


p.s. - Did you notice my girls' cute little purses in the closet? Don't you just them?! They're custom made by my super talented sister-in-law, Amy. You can find her here and custom order your own! :)

read more

Wednesday, March 11, 2015

Wine Wednesday - Wine Rack and Glass Hanger

It's Wine Wednesday!


I made this wine rack in stages - we've had a LOT of snow days lately here in NOVA, some of which were frigidly cold, so my garage time has been limited! (Also, I kind of tore the carpet off our stairs and am working on refinishing them, but that's a story for another time. ;) )

I first saw this design on a brag post on Ana White's site and loved the idea, but wanted something less rustic-looking. I decided to make it with clean, smooth boards instead of pallet wood to achieve the more crisp look I had in mind. I based my design off of the picture and just sort of messed around with it until I got it put together. Sometimes trial and error is the best way to go. ;)


Because I was anxious to get it done and see if my design would work, I put it all together without painting it - not the best plan, but live and learn!

The cuts for the wine glasses didn't work as well as I had hoped, but I let it go. Surprising, right? Well, that didn't last too long - my obsessiveness eventually got the best of me and I fixed it later, surprising no one.

At this stage, I painted it the dark blue/gray that I'm in love with right now (just like the Christmas Card Frame) and left it alone for a bit. (The lighting here really doesn't show the color well! Much more blue and less gray in person!)


I decided that this would be a perfect birthday gift for my sweet mother-in-law (she loves making wine with Janet and loves handmade gifts!) and so tore off the glass rack piece to try again - can't gift something I'm not proud of!

Redoing the rack was more trial and error to be sure the glasses wouldn't hit each other. My measuring was wrong the 2nd time and the cuts were such that the glasses would hang off-center... can't have that! Blargh. So I started a THIRD time and finally got it the way I wanted it (trial and error sometimes wastes wood and that made me mad!). The cuts are still not as smooth and perfect as I'd like, but I'm still working on the technique - decided to stop being so critical of myself and let it go. Shocking, I know!

She loved her gift! Here is a picture of it in action, though not drilled into the wall since this is my house! My wonderful assistants held it up for the picture - hand-modeling agents can contact me for their info! ;)


Since the whole piece really needed a second coat of paint, I suggested Chris choose something from my collection that would suit her best... she picked my fav green! (The same as I used on the table saw stand!) Preeeeetttty!


All done! Can't wait to see a picture of it installed and full!

I learned a lot through this project. Hopefully I can make it more easily next time! I'm planning to list it in my Etsy shop when I get it up and running. Yes, I'm working on opening up an Etsy shop! So scary fun!

Tools used - all my favs! : Ryobi Circular Saw, Ryobi Air Nailer, Kreg Jig, and Ryobi Drill

read more

Tuesday, January 27, 2015

Hanging Jewelry Cabinet

I was so happy this week to finally get back into the garage after almost a month to make this fun jewelry cabinet!


Between snow days, freezing cold days, busy days, sick days, cranky days, there just weren't many building days! But this week I finally got to Tart Lumber to spend my Christmas gift card (thanks to my lovely in-laws!) on some nice lumber to get back to work! I have quite a few projects on my to do list and have been anxious to get at it!

There's nothing glamorous about driving a mini-van, but check this out! That's a lot of lumber, some 10 ft long, and I closed the trunk with no problem! 

The first thing I chose to try was this fun hanging jewelry cabinet. A friend from church asked me for a hanging jewelry cabinet, which led me to Ana White's site, as usual, to look for plans. I found this and fell in love with it. Since it wasn't quite what she had in mind, I made one for myself instead! (But don't worry, we'll find something for sweet Pj. :) )

I was so excited to dive back in, that I didn't take any pictures until after I had the frame and door built! But that was partly because they were so easy to do!


The plans suggested using the Kreg Jig to make pocket holes for the frame, but I decided to use my new countersink drill bits (another Christmas gift - thanks, Brad!) and just screw the frame together from the outside. I love the strength of pocket holes, but I haven't mastered covering them and I didn't want to be able to see them inside or under the frame.

I did use pocket holes for the door, and my Kreg jig made that very easy. And the joints look so clean on the front this way!

I decided to paint at this stage before adding the wire mesh and hinges, so I paused here to fill holes and sand. I got this new Elmer's wood filler that starts out purple and turns white when it dries - I love it! It dries quickly and the color change makes it easy to know it's ready to be sanded.

(ignore that I kind of gobbed it on there...)

All dry!

Since I planned to hang this cabinet in our bedroom, I painted it the color of our accent wall. (See, saving all my paint comes in handy! :) )


You see the chicken wire attached to the door in that picture (left over from the Christmas card frame), but I didn't like the way that looked, so I swapped it out tonight for a square 1/2" wire mesh instead. I used tin snips to cut the wire - much easier than the wire cutters I started out with! Then I just used my craft stapler to attach the mesh to the back of the door. (and a flat head screw driver works great for removing the staples if you change your mind like me! Just don't forget your safety glasses!)

To attach the hinges, I used Ana's great tip of putting blocks inside the frame to hold up the door - so easy to screw everything in place that way.


I opted not to put a back on my cabinet this time, but have fun ideas for including one another time with some sort of stencil or pattern painted on it to show through - how cute would that be?!

I added nails to the cross pieces for hanging necklaces and bracelets. I didn't measure this, trying to let go of some of my perfectionist tendencies, and just put 6-8 nails on each row. Then I just pre-drilled holes through the cross pieces to screw the cabinet into the wall.


The perfectionism came back with a vengeance when I hung it up for the first time last night and found that in all my careful checking for square all the way through the project, I still messed up when I attached the top and it looked crooked once it was up. It's amazing how quickly one can swing from proud of something to embarrassed by it - from empowered to imposter. Or maybe that's just me. :P  I left it up last night but stewed over how to fix it until I took it down this afternoon. I popped the top back off (it was nailed on), sanded the one side down, did some other minor adjustments, and nailed the top back down. There's still a small gap, but I'm trying to live with it. ;)  The struggle is real!


So there it is! Dangle earrings hang on the front of the door, necklaces and bracelets on the nails. I'm thinking about ways to incorporate something for post earrings and then I'll make one for the girls! My 7 year old asked as soon as she saw it, "Was this hard for you to do? Could you make 2 smaller ones, one for each of us?" It's nice to be appreciated. :)


read more

Thursday, December 25, 2014

Space-saving Shoe Cabinet

Finally I can post about the project I've been working on lately - it was a Christmas gift, so I couldn't broadcast the pictures and ruin the surprise!

My mom asked me to build a shoe shelf for by her back door... but on legs to keep the shoes out of reach of her puppy. I didn't like the way that looked in my head, so I suggested something that would close instead of something on legs. She was up for whatever, gave me the measurement limits and chose a color... and I was free to decide the rest.

I looked around on ana-white.com and immediately found plans for a cool shoe cabinet that fit the bill! I love that it is only about 6" wide and sits flush against the wall. I also love that it provides a flat surface on top for decorations, mail, keys, whatever! It's so narrow that it wouldn't be in the way, even in an entryway as small as mine! (As evidenced here - I set it up at our house before we headed out to take it to NY and was tempted to keep it! It even matches my living room!)


I altered the plans to make it 36" wide instead of 48" to fit her space, and was ready to get to work! Once I got the frame and drawers built, I realized I might be in over my head - figuring out how to drill the holes for the dowels and make everything fit was confusing me... I stalled out but spent the time painting the pieces, since I figured the drawers and inside of the frame would be difficult to paint once it was together.


Avoidance is only a temporary fix, though, and eventually I had to deal with the fact that I didn't really know what I was doing for the next step. So I spent time re-reading the plans and comments on the website. I didn't find anyone else having too much trouble with the dowels, so I thought maybe I was just making it harder than it needed to be (no.....) and decided to just give it a try. I won't lie and say I was successful right away. I actually screwed up, slammed the garage door, and stewed overnight one night - I was sure I had screwed it up beyond repair. But in the fresher light of day, in the mostly dark garage, I was able to fix it and finally had working tilting drawers!


Mom measured her baseboards and I added legs to the front of the cabinet tall enough to clear them. Without legs on the back and with a cleat inside to attach the cabinet to the wall, the whole cabinet sits flush against the wall, assuming the wall is straight. LOVE this feature! Luckily for me, the legs were 3.5" tall, which is the width of a 2x4 which meant I could support the back with a piece of scrap once the legs were on. Now it could stand up in the garage while I worked on the last details. Love when things work out.


Speaking of things working out, I started on a project for Brad while I was waiting for the wood filler to dry (so much wood filler...) and saw this - here's the back of the shoe cabinet, the miter saw table, and the workbench  Apparently this is just how tall I build stuff now...


A couple of straps on the backs of the drawers (to keep them from opening too far), a couple of handles, cabinet locks, and touch-up paint, and I was (finally) done!


That is, until I got to NY and had to adjust the cabinet locks and touch up the paint. My family had a great time teasing me about obsessing so much about tiny details, but HELLO. The blog is called Obsessive Constructive for a reason... why are we surprised?!

Here it is installed! They're happy with the look, dad's happy with the low-profile against the wall, and I'm happy it's finally done. It was a challenge to build, but since it was my first build with moving parts, I'm proud to have been able to eventually make it work!


read more

Thursday, October 2, 2014

The Coat Closet - my first build!


Our coat closet is one of those spaces that always felt like a work-in-progress. There has been a LOT of staring involved in this one...

When we toured this house before we bought it, I loved that the previous owners had installed a second rod low enough for the kids to hang their own coats - brilliant! Once we moved in, I was less excited that they also had swinging saloon-style doors on the closet. The front door and the door to the garage both open toward (and then covering) this closet... add 2 adults and 2 kids trying to come in and put their shoes and coats away, and no clearance between the opening doors and the stairwell, and, well, I sort of ripped the swinging (never fully closing) doors off that closet one day. Oh, the satisfaction.

But then the closet was in plain sight every time we walked down the stairs... ahhh! Disorder, clutter, I can't even...

It needed to be WAY more organized now. As it was, we had very little space for shoes, bags, mittens, etc, so it was pretty messy.

First I tried tearing out the shelves and rods and put in a bookshelf and hooks on the walls in front of it. This was actually a pretty good solution for a while. The shelves offered a lot more shoe storage and also allowed for cube organizers for holding hats, balls, etc. But then winter came, coats were bigger, they hung in the way of the shelves, ... clutter (I can't stand clutter!)

... more staring, more measuring.

(Realizing that I really need to take more before and during pictures... sorry for the lack so far! Ha!)

Anyway, fast forward through tearing that out, emptying a different shelf from the basement and hauling it upstairs only to realize it wouldn't actually fit, tearing the jerry-rigged door frame off, spackling and painting... and then more staring and googling.

Internet searching brought up lots of "almost right" but super pricey options. Thankfully, my google searching also turned up these plans. It didn't look much more difficult that assembling Ikea furniture (which I have a LOT of experience at, ha!) and the government shutdown was looming, so I decided the build-it-myself option was better then the spend-too-much option!

I had so much fun building this and Ana White's plans made it so easy! I seriously had it to this point in an evening! I loved being able to customize the size to fit the closet just the way I wanted it to, and the whole thing was just so empowering!

Once I had it in place, I realized I needed the backing so that the shoes wouldn't slip back too far. I decided to paint a subtle circle design on the piece before attaching it (by dipping a plastic cup in paint and stamping the circles in an overlapping pattern) but realized after that it was a bit too subtle and not really noticeable, but oh well! Not every plan works out.


Add lots of hooks on the walls at all different heights for coats, hats, bags, etc and we're all set!


This solution has actually held up now for a year, so maybe I've finally found a solution that will last!


So, what space in your home are you constantly changing? (or staring at...)  ;) 
read more

Tuesday, September 30, 2014

Brag post of the Day on Ana White!

Ana White's website full of amazing plans is what inspired me to start building furniture. Posts about the projects I've done using her plans are coming soon, including a full description of this build, but for now, check this out!

The beds I made for the girls were featured on her website!

Mom Built, Kid approved!
Brag Post of the Day! Mom Built, Kid Approved! Complete with Hideout/Hangout area under corner storage tower! Great build by stacieb, from plans http://ana-white.com/2010/06/plans/corner-hutch-plans-twin-storage-beds and http://ana-white.com/2011/04/plans/hailey-storage-bed-twin


read more